One-pot Coquillettes pasta in the pressure cooker

Growing up in Canada, pasta recipes varied from Italian classics or free-style vegetable heavy recipes to good old Macaroni and cheese (homemade or that classic boxed one with the bright orange powder). So who was I to judge the French and their pasta making? I would often hear of “les pâtes au beurre” or maybe a bit of ham, but nothing resembling a beautiful Pasta Primavera filled with crisp spring vegetables and big on flavour or a slow cooked ragu… I am talking about the year 2000 and things have definitely evolved ! !

Well the French have gone and impressed me again with a simple recipe, ready in no time at all and absolutely full of flavour. Dare I say that it could be called a “French” macaroni and cheese? This recipe is made in a trusty pressure cooker and since its a one-pot pasta recipe, the starchy cooking water stays put and creates a silky sauce with the other ingredients. Using only 6 ingredients if you don’t count water, salt & pepper. DON’T leave out the onion, it adds a beautiful flavour.

I discovered this recipe on my favourite French radio show / podcast “On va déguster” on France Inter. The invited chef Frédéric Vardon, chef at 39V in Paris made this dish on a recent episode. I’ve adapted the quantities to serve as a main course for the large appetites of my family 😉 A nice starter of crunchy green veg in a mustardy vinaigrette such as THIS ONE by Amanda Haas would be great to make this a complete meal.

Coquillettes with ham, butter and comté cheese

  • Servings: 4
  • Difficulty: easy
  • Print

  • 300 g Coquillettes (little elbow macaroni or other small pasta shape)
  • 150 g Thickly sliced cooked ham
  • 450 g Chicken stock or water
  • 90 g Aged (18 months) Comté (substitue gruyère or cheese of your choice)
  • 75 g Butter
  • 75 g White or yellow onion
  • Salt & freshly ground black pepper

Finely chop the onion, cut the ham into small / medium cubes and grate the cheese (not too finely). In your pressure cooker, melt the butter over a medium heat and sweat the onions being careful not to brown them. Lightly season with salt and pepper.

Add the ham, stirring to coat in the butter to heat through without drying out, then add the pasta and stir for 1 or 2 minutes as you would a risotto.

Add the stock or water, cover, close the pressure cooker and increase to high heat. When it reaches pressure move to a low heat and cook for 2 minutes.

Manually release the steam by running cold water over the lid before opening.

Add the grated cheese and stir to create a creamy sauce.

Add salt if needed and another grind of black pepper. Serve immediately !

NOTE: I am used to a stove top pressure cooker. Adapt if necessary for an electric one or an Instant Pot

Bon Appétit !

Wilted lettuce hack extraordinaire

Working in markets is heavenly for getting our hands on beautiful food all week long. The downside is in the summer we often come home with some overheated produce. Special mention for lettuce and other greens 😦

This “floppy” salad game changer is an unexpected surprise that has left me impressed and extremely pleased to have discovered it ! The usual and logical suggestion is to soak the leaves in ice cold water to bring them back to life. When I read to do the total opposite, to soak my wilted lettuce in HOT WATER, I was intrigued enough to give it a try. My lettuce was floppy to a “nothing to lose” stage.

You simply pour water at 50°C over the lettuce leaves in a bowl and leave for a few minutes or even to cool completely in the water. You then shake the leaves dry, wrap in a cloth and store in the fridge until needed. If you want to eat the lettuce right away just rince in cool water. Its nothing new but strangely rarely recommended. An article from 2013 in the Modernist Cuisine website explains the science behind the “heat shocking” method well. An article by Shilpa Uskokovic on the Bon Appetit website more recently brought the information into the media.

Frankly this one is a keeper… TRY IT !

Congee revelation

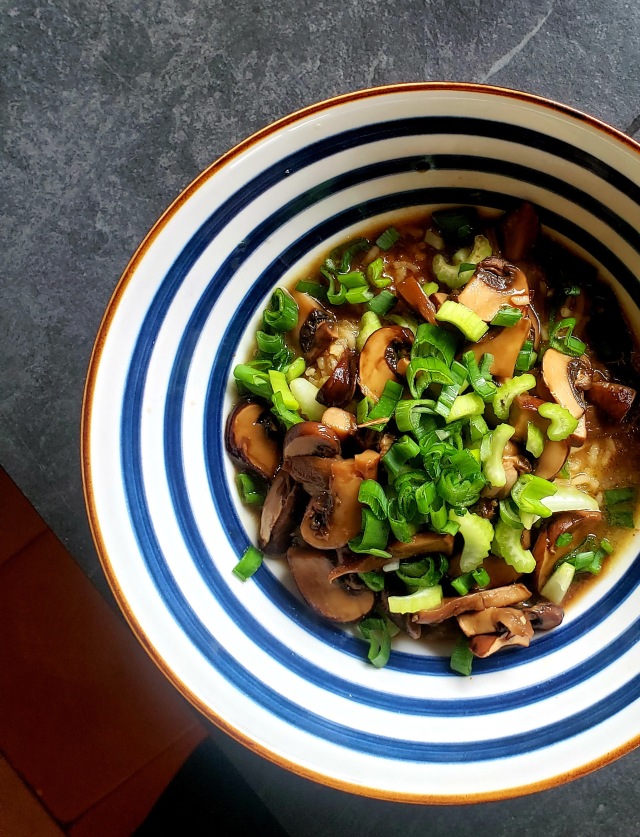
OK wow ! Up until recently, maybe because of its beige”ness” and imagined mush factor, I had not been tempted to try Congee. Well, I had it all wrong ! This is an ultimate comfort food hailing from many Asian countries.

Essentially a savoury rice porridge, Congee can basically be just rice and water, cooked until the rice is silky smooth, then topped with a variety of chosen ingredients. The sharp pop from the pickled celery here is delightful, but the possibilities to make this your own are endless ! The recipe (thank you Meera Sodha) that inspired me to take the leap is actually vegan. Even more surprising for me as for anything brothy I usually go for a bone based broth. The depth of flavour in this recipe is savoury and satisfying. Officially added to the winter rotation !

Congee with celery and mushrooms

  • Servings: 4
  • Difficulty: easy
  • Print

  • 420g celery
  • 2 tbsp rice vinegar
  • 6 tbsp mirin
  • 20g dried shiitake or porcini mushrooms
  • 2 tbsp (30g) white miso paste
  • 2 tbsp olive oil
  • 250g fresh button or oyster mushrooms, sliced or torn
  • 1 yellow onion, peeled and finely diced
  • 2 spring onions, finely sliced, whites and greens separated
  • 5 garlic cloves, peeled and finely chopped
  • 1½ tsp sea salt
  • 2cm x 2cm knob fresh ginger, peeled and grated
  • 150g jasmine rice
  • 2 1/2 tbsp soy sauce
  • Shop-bought or homemade fried onions or shallots, to finish (optional)

First prepare the pickle. Finely slice a third of the celery, pop it in a small bowl with the rice vinegar and two tablespoons of mirin, stir and put to one side. Chop the remaining celery stalks into small, ½cm dice and set aside.

Put the dried mushrooms in a heatproof measuring jug, pour over 750ml just-boiled water and set aside while you prepare all the other ingredients. When the mushrooms are cool enough to handle, squeeze out any water and put them to one side. Carefully and slowly pour the mushroom stock into another jug, leaving behind any grit at the bottom of the first jug, then stir in the miso and two tablespoons of mirin.

Put the oil in a large pan on a medium heat and, when it’s hot, add the fresh mushrooms and stir-fry until nicely browned, remove and put aside. Add a bit more oil then the onion, spring onion whites, garlic and salt, and cook, stirring so it doesn’t colour, for four minutes. Add the diced celery and ginger, fry for five minutes, again stirring, then add the rice, mushroom stock and another 600ml water. Bring to a boil, skimming off any scum, if you wish, then pop on a lid, cocked, and leave to simmer for 30 minutes.

While the congee is simmering, make the braised mushrooms. Slice the drained soaked mushrooms, then put them in a small saucepan with the soy sauce and the remaining two tablespoons of mirin. Bring slowly to a boil on a low heat, then turn down to a simmer and cook for 10 minutes, until the liquid glazes the mushrooms and there’s no liquid left at the bottom of the pan. Combine this with the sautéed mushrooms.

Ladle the congee into individual bowls, layer on a quarter of the braised mushrooms, a little celery pickle, the reserved spring onions greens and fried onions, if using, and serve hot.

Recipe slightly adapted from Meera Sodha’s recipe.

The original recipe can be found at The Guardian.

Bon Appétit !

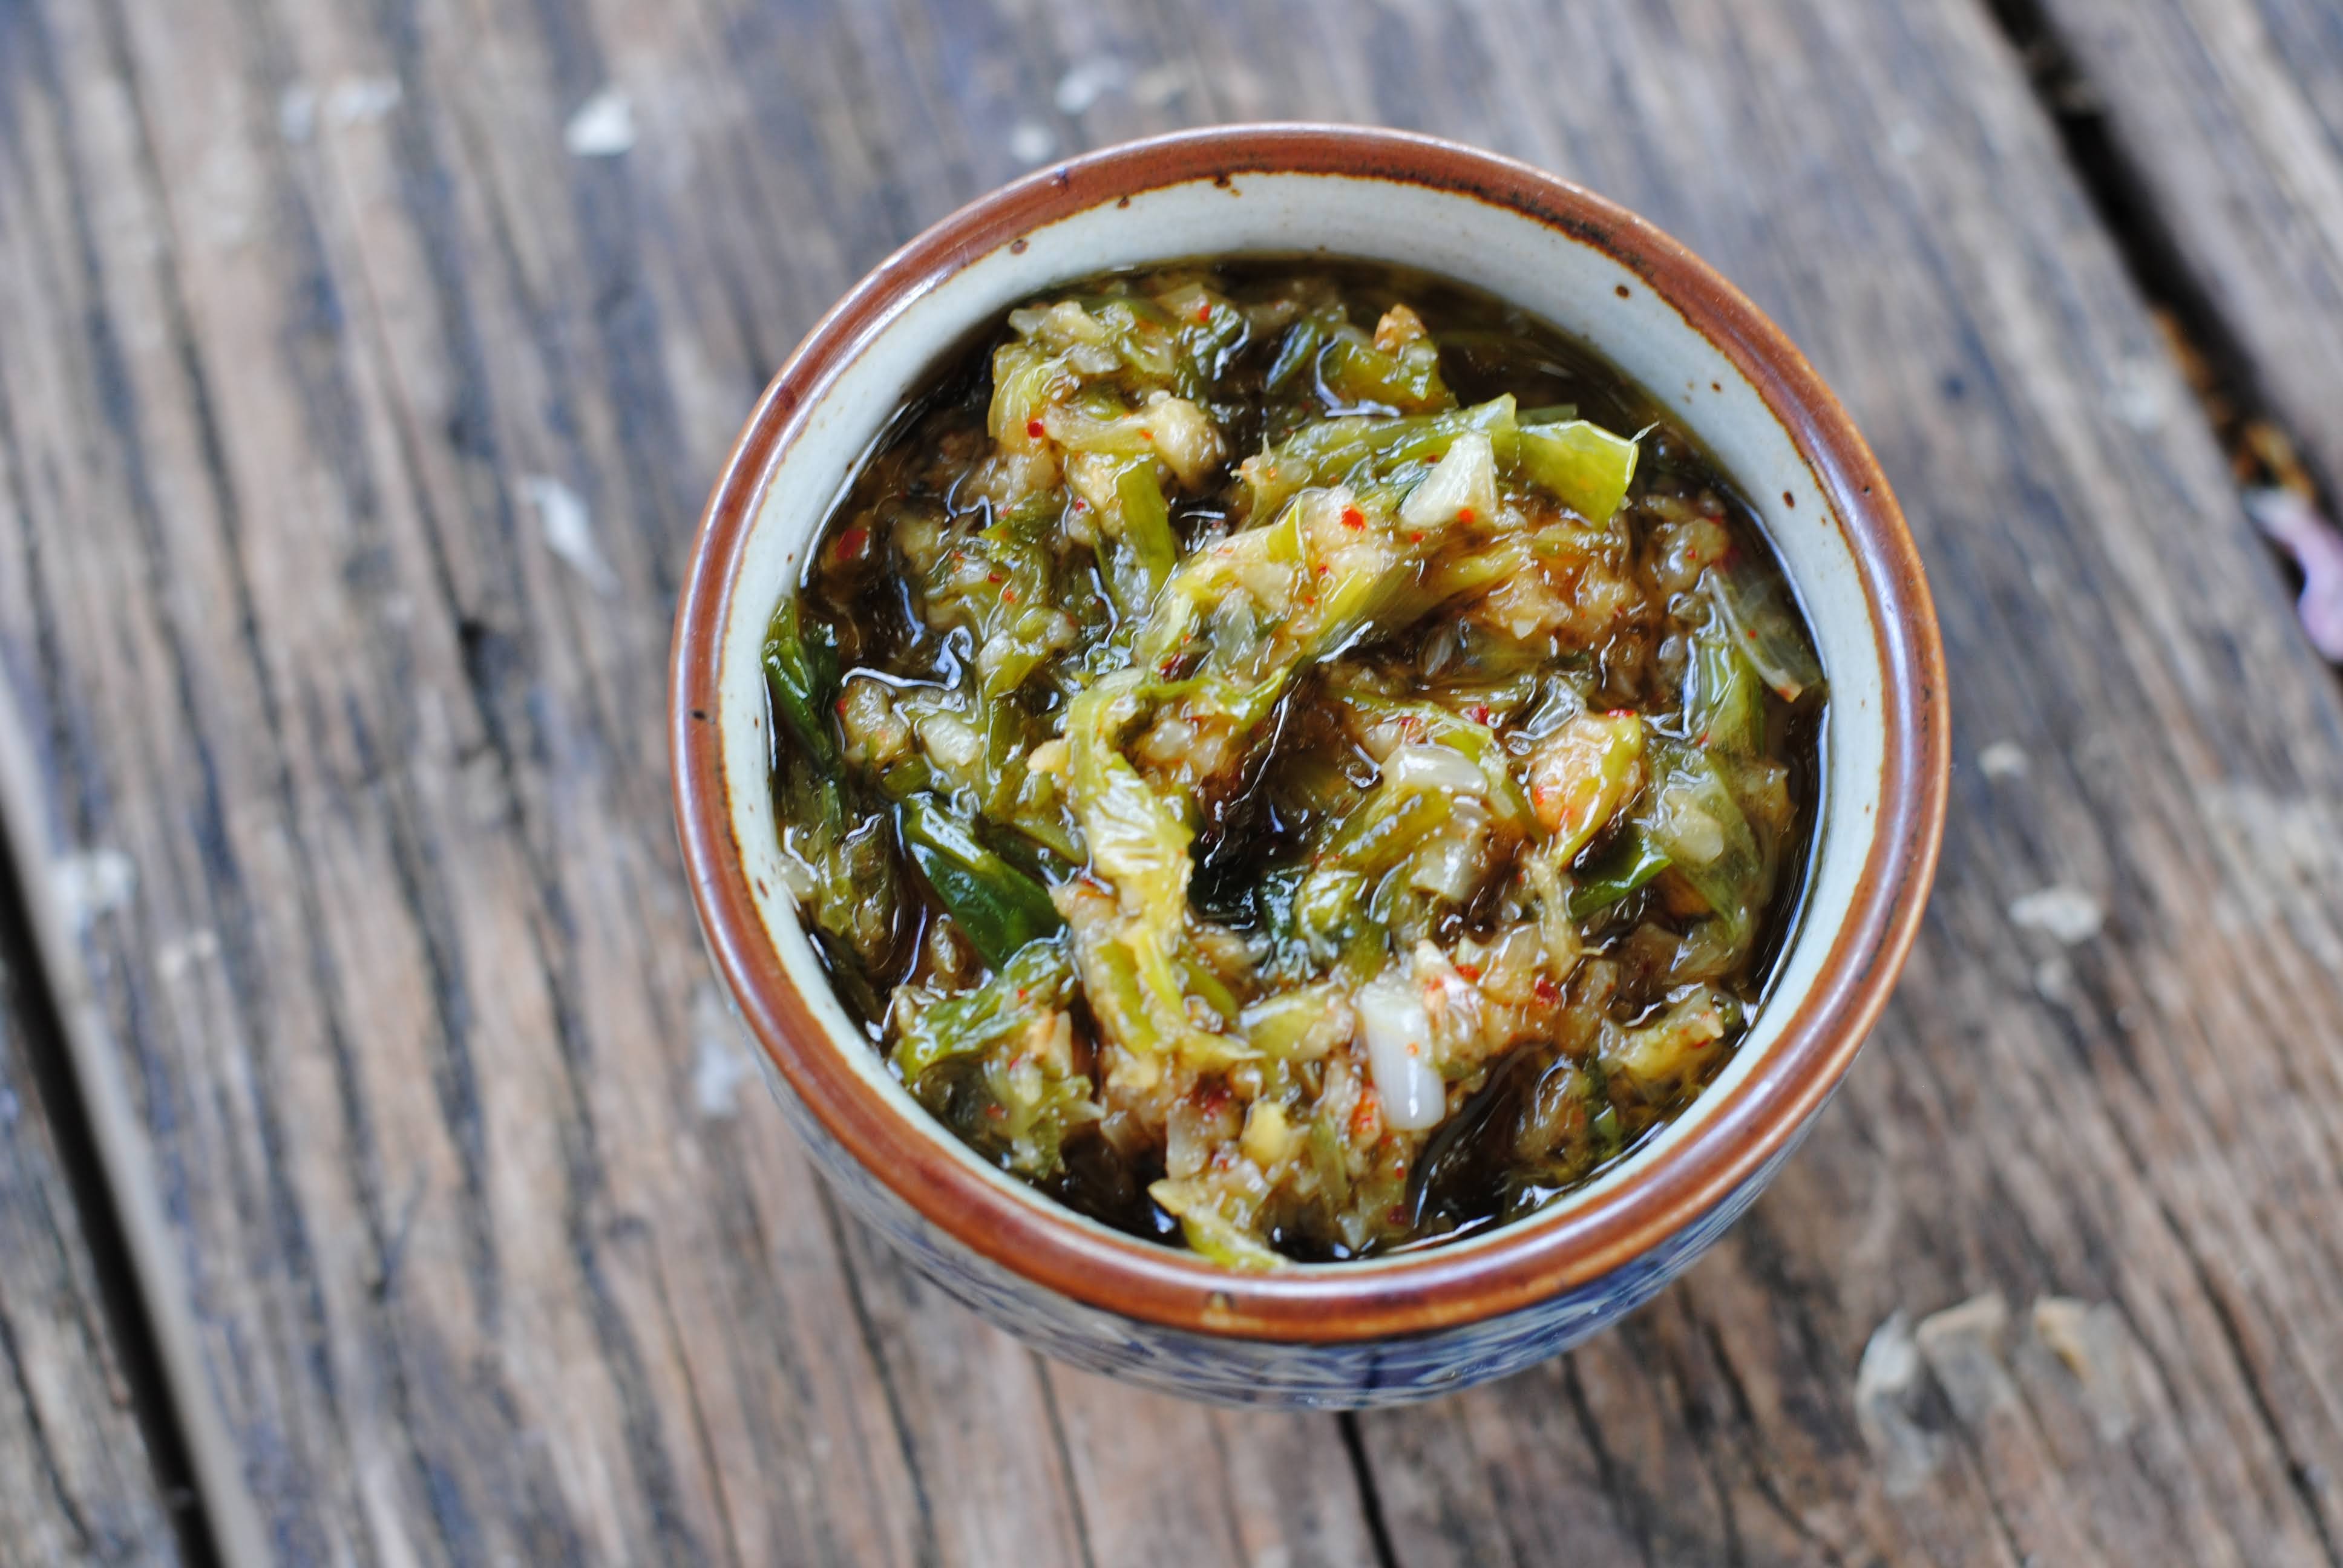
Spring onion & ginger oil

Love love love this stuff. It goes with everything, including eating it by the spoonful. So when spring onion season is in full swing, I make a few jars as it keeps for weeks in the fridge.

More like a sauce or condiment to top stir-fries, noodle soups or just a bowl of rice and a fried egg (one of life’s most delicious things).

Spring onion & ginger oil

3 – 6 tablespoons minced ginger

1 tablespoon minced garlic

3 spring onions, minced

chopped fresh red chilis, as many as you like (or dried chili flakes) (optional)

1/2 cup neutral oil

1/2 teaspoon soy sauce

1/2 teaspoon sugar

1 teaspoon Shaoxing wine (or dry sherry)

1 teaspoon salt

Prepare the ginger, garlic, spring onions and chili peppers. In a small saucepan, heat the oil over medium heat. Add the ginger and gently fry for about 15 minutes until the colour deepens into a more golden yellow. If sizzling too much, turn down the heat. Add the garlic and cook for an additional 5-10 minutes. Follow with the spring onions, stirring until they are cooked through. Add the chili peppers, if using, letting them also cook through. Finally add the soy sauce, sugar, Shaoxing wine and salt (more salt can be added to taste). Use immediately of store in a glass jar in a fridge for up to a few weeks.

Thanks to one of my favourite food blogs The Woks of Life for the original recipe

Bon Appétit !

Crazy Easy Foccacia

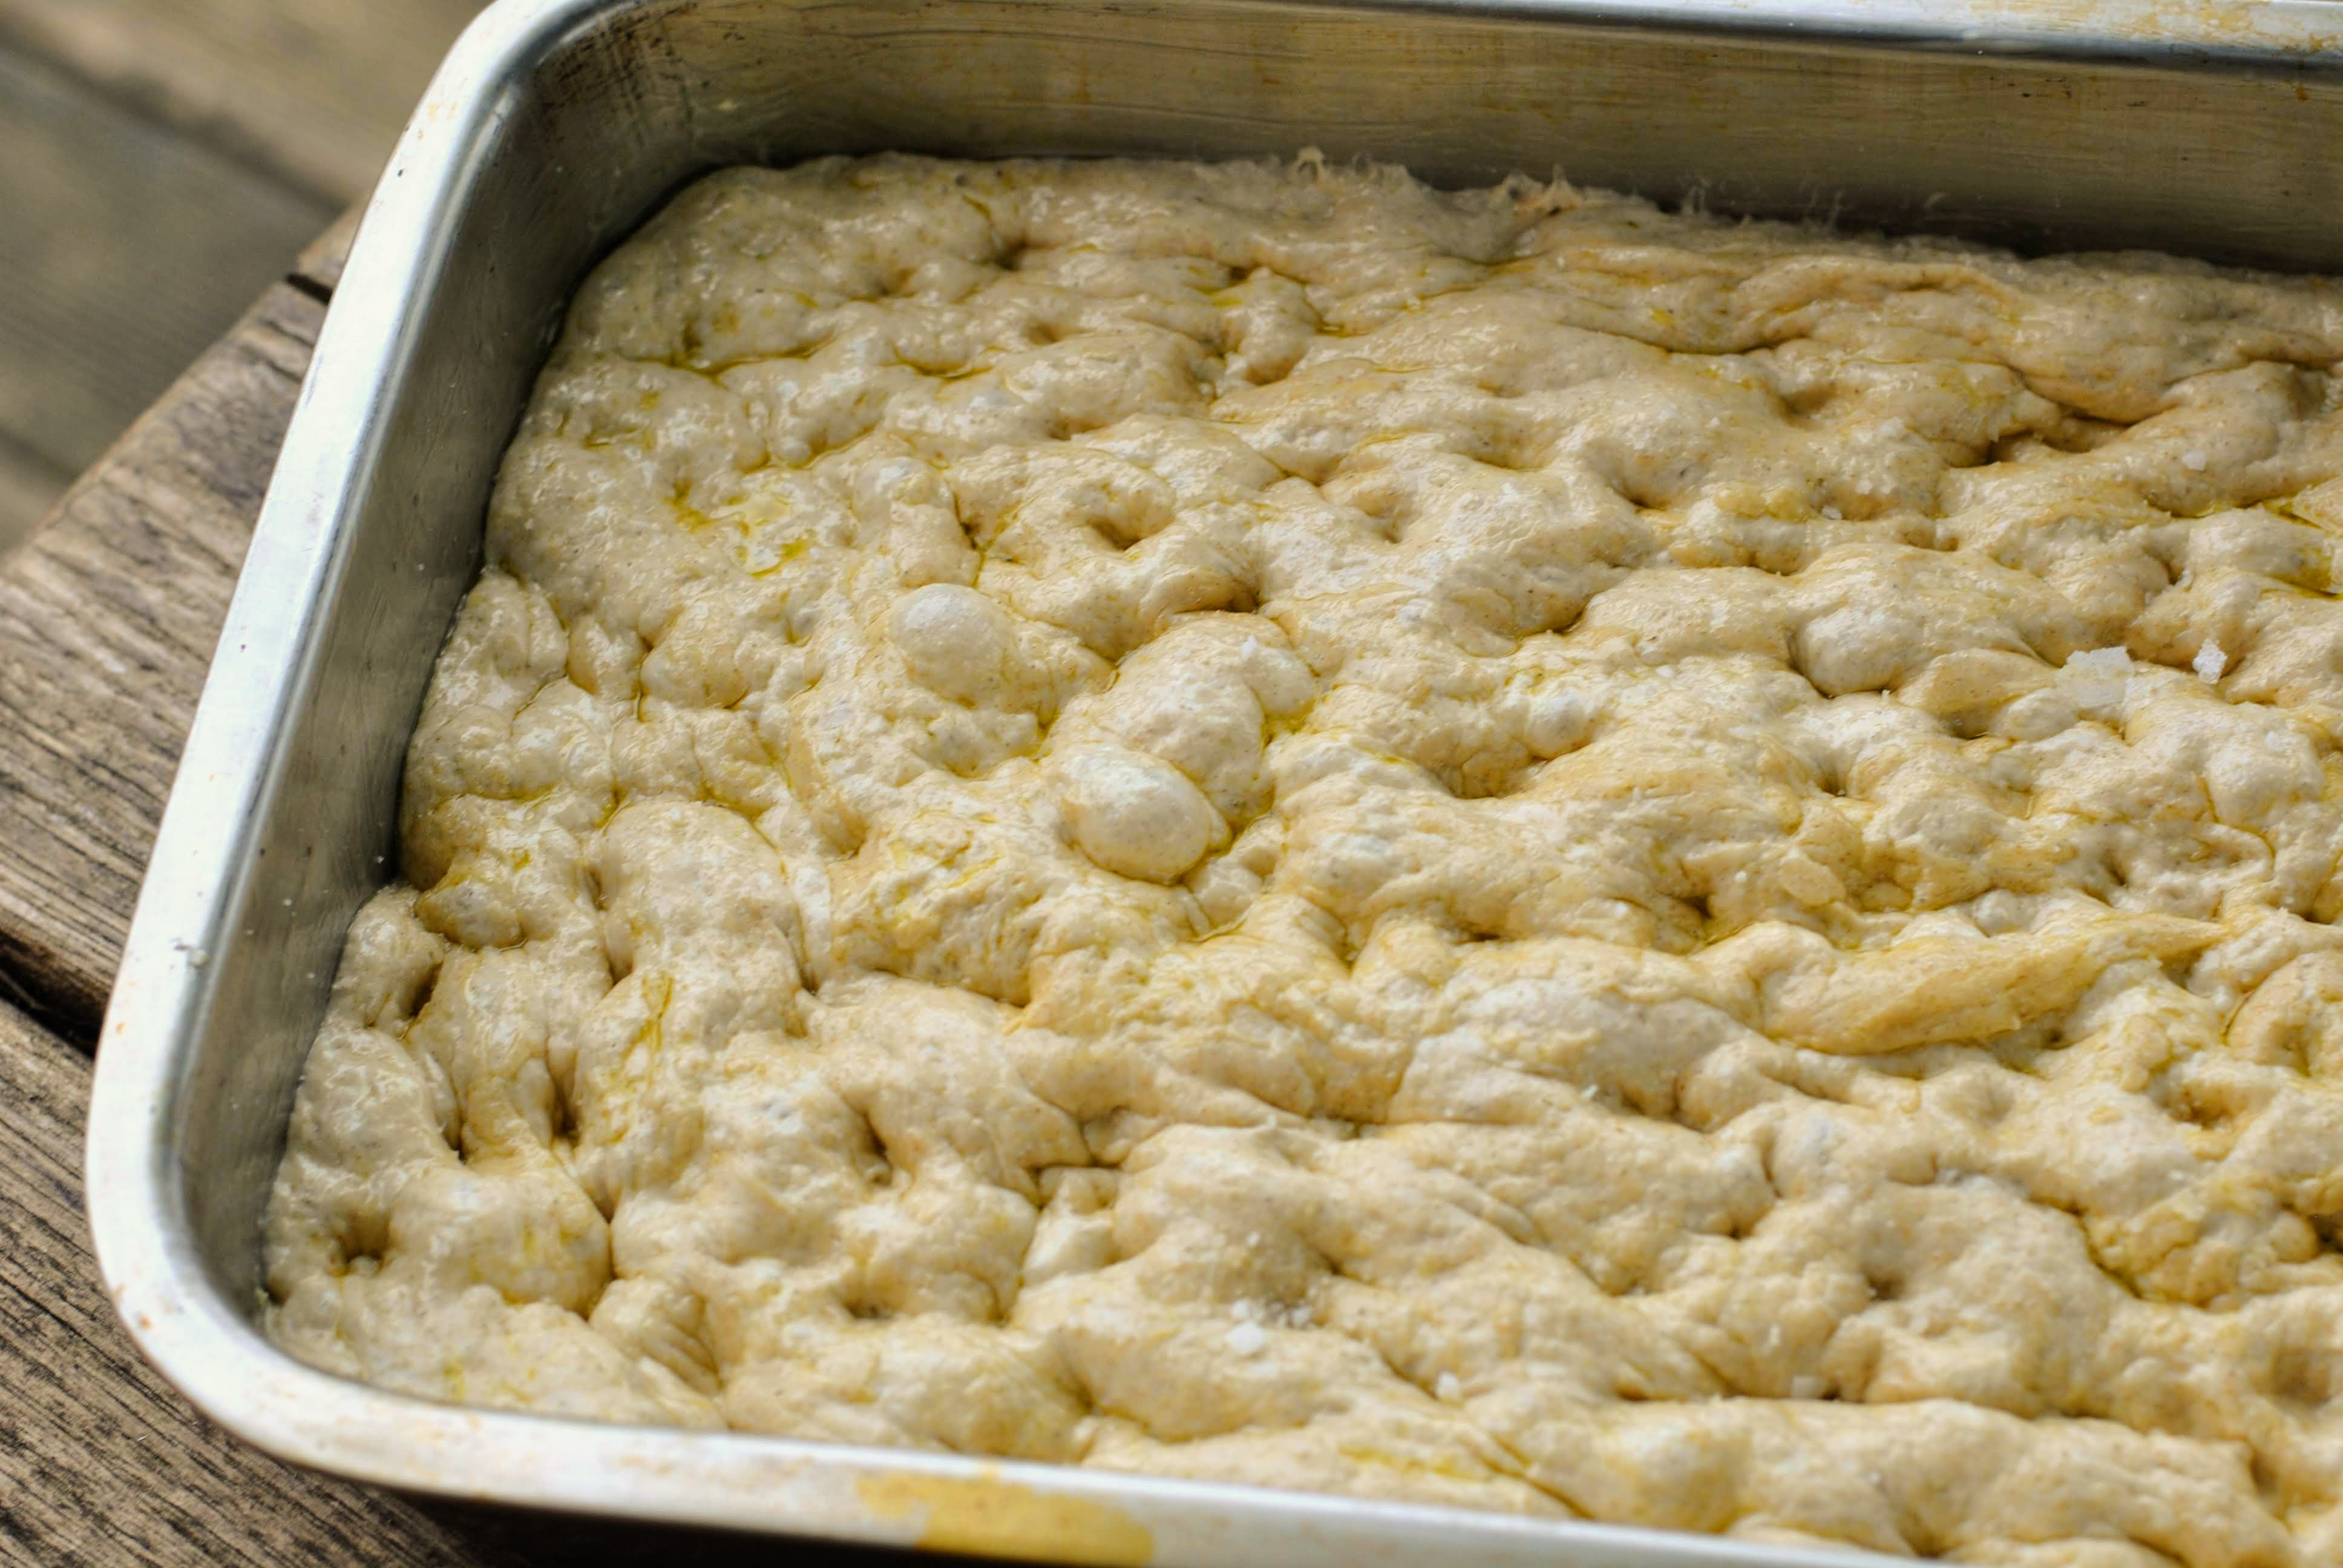
One of the most successful weekend baking projects with my son. It can be made thick and fluffy or thinner and crispy depending on the pan size you choose, but it really is what Bon Appétit calls it: Shockingly Easy ! I’m not much of bread baker but this recipe is firmly on the list with my favourite Montreal Style Bagel recipe and a delicious Flatbread recipe as pretty much the only bready things I make.

No kneading, just loads of hands off time. Flavour is improved by letting it do its first rise in the fridge overnight. The best bit is using your fingers to create deep dimples in the dough before popping it in the oven.

Shockingly Easy No-Knead Focaccia

10 – 12 servings

  • 1 (¼-oz.) envelope active dry yeast (about 2¼ tsp.)
  • 2 tsp. honey
  • 5 cups (625 g) all-purpose flour
  • 5 tsp. Diamond Crystal or 1 Tbsp. Morton kosher salt
  • 6 Tbsp. extra-virgin olive oil, divided, plus more for hands
  • Flaky sea salt
  • 4 Tbsp. unsalted butter, plus more for pan
  • 2-4 garlic cloves

Find detailed instructions on the Epicurious website

Bon Appétit !

Thanks to Bon Appétit for the original recipe

Oatcakes

There seem to be a few versions of what would be called “oatcakes”, mostly from the UK and Scotland. This recipe resembles the Scottish variety, kind of like a cracker. Delicious with cheese, almond butter or a thick slather of good butter. These are is so fast and easy to whip up, naturally gluten free, for those looking for GF snacks, and works a treat in my solar oven as well 🙂

To make your own oat “meal”, which is hard to find in some countries, use a food processor or coffee grinder to grind normal oats to a mealy texture (not as fine as flour). They also keep for many days or up to a week in an airtight container. I really do not enjoy rolling out dough, but this dough is really easy to work with !

Oatcakes

  • 3 to 4 Tablespoons (45 to 60g) boiling water
  • 1 1/2 Tablespoons (21g) butter
  • 1 cup (90g) oatmeal (or ground oat flakes)
  • 1/4 teaspoon baking powder
  • 1/4 teaspoon sea salt

In a cup or small bowl, combine 3 tablespoons of the hot water with the butter. Stir and leave to melt.

Meanwhile, combine the oatmeal, baking powder and salt in a large bowl. Add the water/butter mixture and mix well. Add more hot water, a few drops at a time if needed to form a stiff dough. Knead the dough, then roll out on a lightly floured surface (use oat flour if keeping gluten free) until very thin, about 3mm thick.

Cut the dough into shapes using a knife or into rounds using the mouth of a drinking glass, or even cookie cutters. place on a baking sheet lined with parchment paper and bake at 180°C (350°F) for about 15 to 20 minutes until crisp but not brown. Check often !! Makes 8 to 10 round oatcakes, if approx. 8cm in diameter.

Bon Appétit !

Original recipe by Dr. Jonn Matsen, Naturopathic doctor

Flatbread with Poolish

How can one not be intrigued by something called “POOLISH”? I love all sorts of flatbread, but find it complicated to make in the house without excessive smoke, or blackening my pans. And my home oven just doesn’t get hot enough. So the idea of our Rocket Stove came to mind. Great success ! Outdoor cooking on a cast iron pan and the flatbreads took on a wonderful smokey flavor.

I learned of this recipe (originally for Naan bread) on the very entertaining podcast The Recipe Club. This was the contribution by Bryan Ford who was shot down (unfairly I think) as the recipe needs some planning ahead. Its kind of like using dried beans, you just need to start the day before, but the hands on time is minimal.

So Poolish ? A Poolish combines equal parts flour and water with a pinch of yeast. This is then left for a few hours (overnight is good) to bubble up. It’s a type of pre-ferment. This adds flavor to the dough and makes it more digestible.

It was a winner with our family and the rocket stove was a great idea ! The bread was swiftly wrapped around my stepdaughter Sarah’s homemade falafals with some yogurt sauce and crunchy veg making for a delicious lunch !

Flatbread with Poolish

POOLISHto be made the day before you want to make your flatbreads

150 grams flour

150 grams warm water

½ tsp dried active yeast 

Mix ingredients in a bowl until no dry flour is left. Cover with plastic wrap and let sit for 12 hours (overnight ideally).

FLATBREAD DOUGH

500 grams flour

250 grams poolish

100 grams whole milk

½ tsp dried active yeast

125 grams full fat Greek yogurt

60 grams water (added last in the mix)

50 grams sugar

15 grams salt

Add all ingredients plus 30 grams of water into a bowl initially and squeeze together. Once most of the liquid has absorbed, add the remaining water and squeeze/mix for a few minutes until the dough comes together. Transfer to a floured work surface and knead with the palm of your hand pushing forward and pulling back into the middle with your fingers. Add flour as needed and knead until you have a smooth, round surface. 

Knead dough to smooth out the surface for a few seconds and then place into a bowl, covered with plastic wrap, to ferment for 4 hours. 

After the bulk fermentation, divide the dough into 150 gram pieces. Divide up any extra dough evenly amongst the pieces. Roll each piece of dough tightly into a ball. Cover with a damp/wet paper towel or kitchen towel and let rest for 1.5 hours at room temperature

Use a rolling pin on a floured work surface and roll out your dough balls. You want to roll it out to about 6-7 inches.

If you don’t have a rocket stove, heat a cast iron skillet until VERY hot.

Place the rolled out dough on the hot pan and press down with a spatula. Cook until you see a nice, dark ring/spots form on the underside (about 1 minute or so). Flip and cook for another minute or so until you develop a uniform amount of dark spots.

Any leftovers freeze well in an airtight bag. Defrost slowly in the fridge and heat up in a hot pan with a sprinkle of water.

Bon Appétit !

Bryan Ford’s original recipe for NAAN with Poolish

Crazy Easy Pastry Crust (no rolling)

The day I came home from the shops with “sweet pastry” instead of flaky pastry. Having promised my son Quiche Lorraine, we embarked on “deep web hunt” for a very simple pastry recipe. I’ve never liked rolling things out. I rarely use pastry, as a result, and if I do, I buy the best quality I can find… I don’t make it.

This recipe was a game changer and has been tested for the said Quiche Lorraine as well as a dryer tart such as “asparagus & ricotta” or a Pissalidière (onion tart). Ok… it’s not exactly like a well made pastry but I’ve heard no complaints around here and it takes about 5 minutes to put together, contains 2 ingredients (plus salt and water), no rolling out, no blind baking ! My kind of recipe.

Crazy Easy Pastry Crust

  • Difficulty: crazy easy
  • Print

  • 1 cup plain or whole wheat flour
  • 1/2 teaspoon salt
  • 1/4 cup olive oil
  • 1/4 cup ice water (fill a glass full of water with ice and then measure out 1/4 cup)

Mix dry ingredients with a fork. Beat in oil and water with a fork then pour into the flour mixture then mix until it comes nicely together. Press the dough into a 9 inch tart dish using your fingers (no need to butter the dish).

Try to fill any possible holes by pushing the dough around with your fingers. Fill with your favourite filling and bake at 200°C for approximately 30min.

Bon Appétit !

Thanks to Food.com and for the original recipe

Risotto Primavera (pressure cooker / instapot)

We wait “impatiently” for this time of year in our family. For the magical trio of broad beans, asparagus and peas to be ripe and ready at the same time. When nature is kind enough for that to happen we celebrate with this dish and good bottle of white wine.

In recent years, I’ve become a convert to the pressure cooker version of risotto which, frankly, I see little to no difference with the “stand and stir” method. I’m sure some purists may beg to differ 😉

Risotto Primavera (pressure cooker)

Serves 4 (meal size portions)

1 onion or a few spring onions, chopped
1 small bulb of fennel, chopped (optional)
2 cloves garlic, chopped
large glug of extra virgin olive oil
300g risotto rice
3/4 cup white wine
900 ml chicken or veggie broth
30g parmesan, pecorino or hard sheeps cheese
50g butter

Sliced bacon or lardons fried with the onions and fennel (optional)
Handful each of sliced asparagus, fresh or frozen broad beans and fresh or frozen peas
Handful of fresh herbs such as mint, parsley and basil or whatever you have on hand

________________

Pod the peas and broad beans if using fresh. Cook the broad beans in boiling water for 1 minute then rinse with cold water. Peel them unless they are really small.

Soften the chopped onion and fennel in olive oil and add the garlic just before adding the rice. Continue stirring until the rice becomes a bit opaque (a few little minutes). Add the white wine and stir for a few seconds before adding the stock.

Clamp your pressure cooker shut. When it comes to pressure, cook on a low heat for 5 minutes and then “fast release”.

Meanwhile pan fry the asparagus on high heat until browned but still crisp.

When you open the lid you may find too much liquid, but stir for a few minutes and it should continue to thicken. When you are almost at the texture you wish add the veg to warm through and finish cooking, then the butter and cheese.

Close the lid for 5 minutes to let the risotto rest and do its creamy magic before stirring through the herbs and serving hot.

I like to pan-fry the asparagus until browned and tender/crisp. The broad beans are blanched and skinned (if needed) and the peas can be thrown in raw near the end. The bacon is totally unnecessary depending on how greedy you are feeling that day 😉 What I do consider quite important, in my humble opinion, (unless you are a vegetarian bien sûr) is a good homemade or bought fresh stock (chicken is a good choice). If you choose to keep it veggie, use the best stock you can find.

The amount of liquid is for the pressure cooker method. If you wish to do this the old fashioned way, the stock must be added hot and a ladleful at a time. You may need more or less than the amount recommended here.

Bon Appétit !

Spring on a plate

A delightful lunch served at room temperature with some crusty bread. Signs of spring are everywhere and its so exciting when each new vegetable arrives at the market. This week its fresh peas . . . heaven ! Find yourself a good Italian style Salsa Verde recipe or mine goes like this: take a handful of parsley leaves, tablespoon of capers (salted ones if you can find them), a few strips of lemon peel (not the white bit), a clove of garlic, a couple anchovy filets, a good pinch of salt and some freshly ground black pepper and chop it all up by hand. Put everything in a bowl and cover with some olive oil and red wine vinegar (taste as you go until it makes you smile).

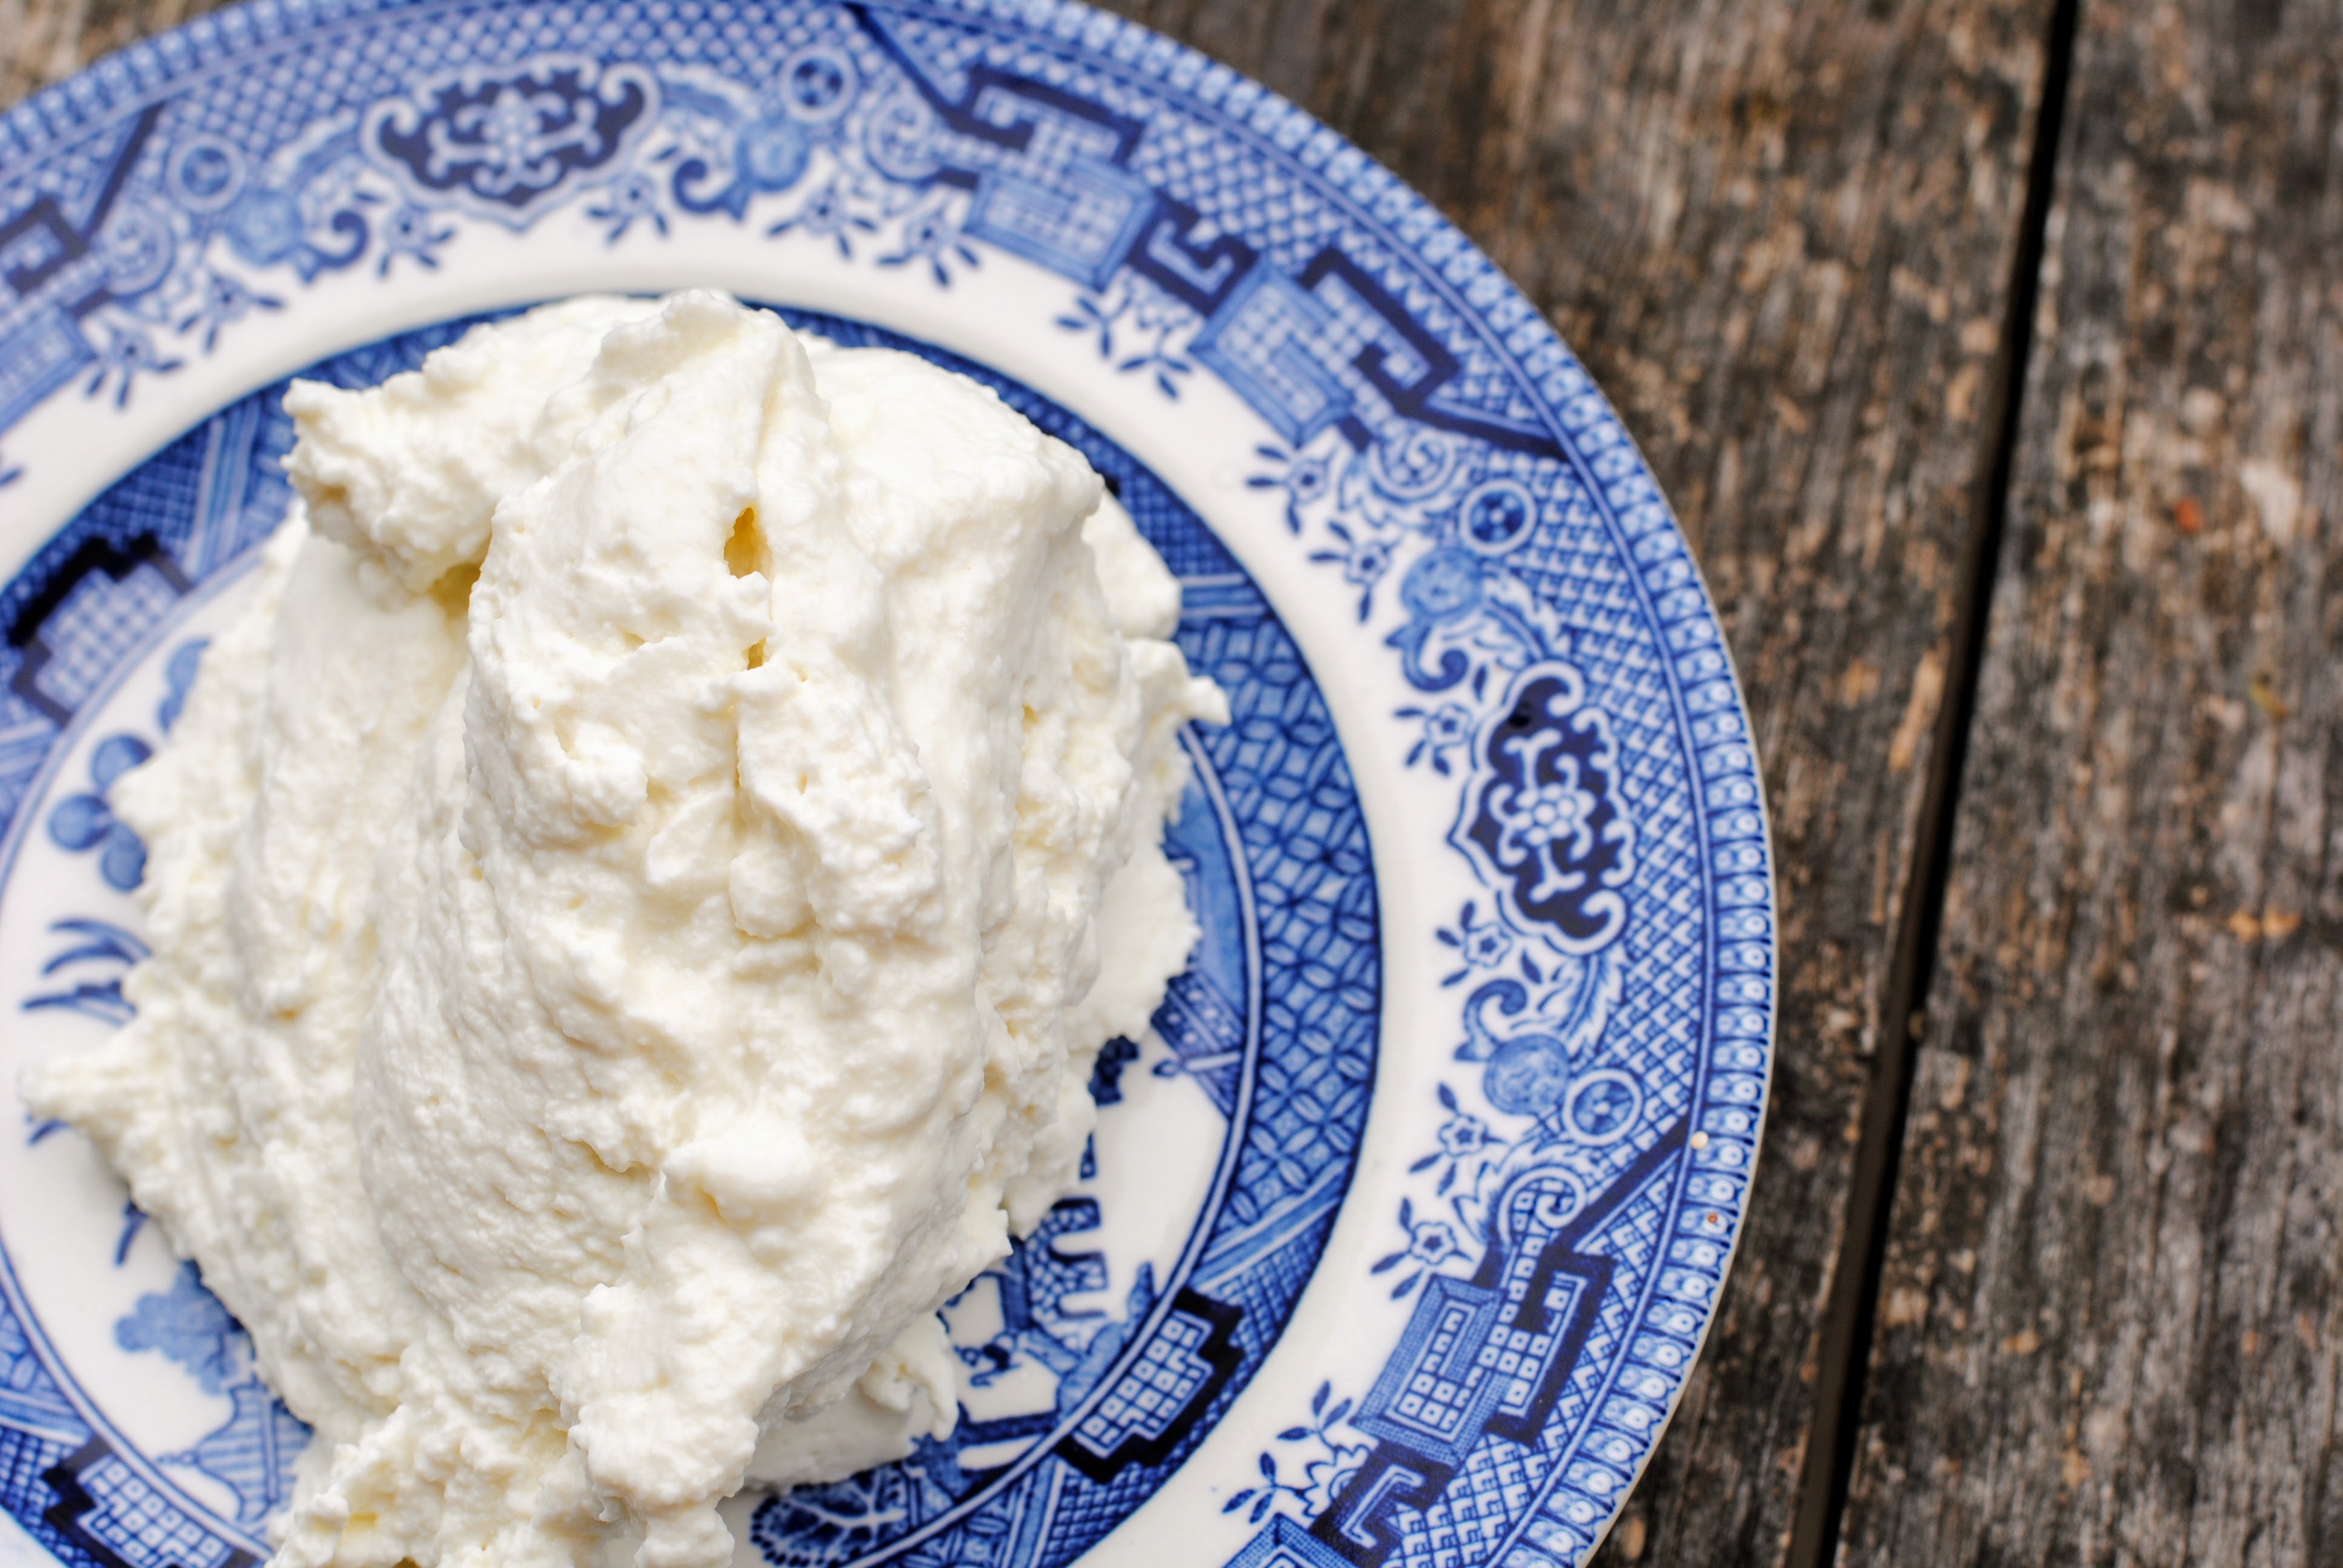
Spring is also the time for local fresh sheeps “greuil” or ricotta. Heap a few spoonfuls onto a plate and top with quickly blanched peas or broad beans (why not asparagus?), some fried or even raw spring onions or fennel and a few good quality cured anchovies if you like. Surround the cheese with your salsa verde and a generous drizzle of good olive oil and a sprinkle of mint if you have some. Quick. . . delicious . . . flavour explosion. . . spring on a plate !

Bon appétit !